HOW TO UPDATE EXCEL SETTINGS TO ENABLE FORMATTING AND ALLOW USE OF GUIDE NOTES
With your Excel File open, please click on the “File” button in the upper right corner of your excel tools. A left hand dashboard will appear with a list of possible actions, one of which is labeled “Options” Please click this button.
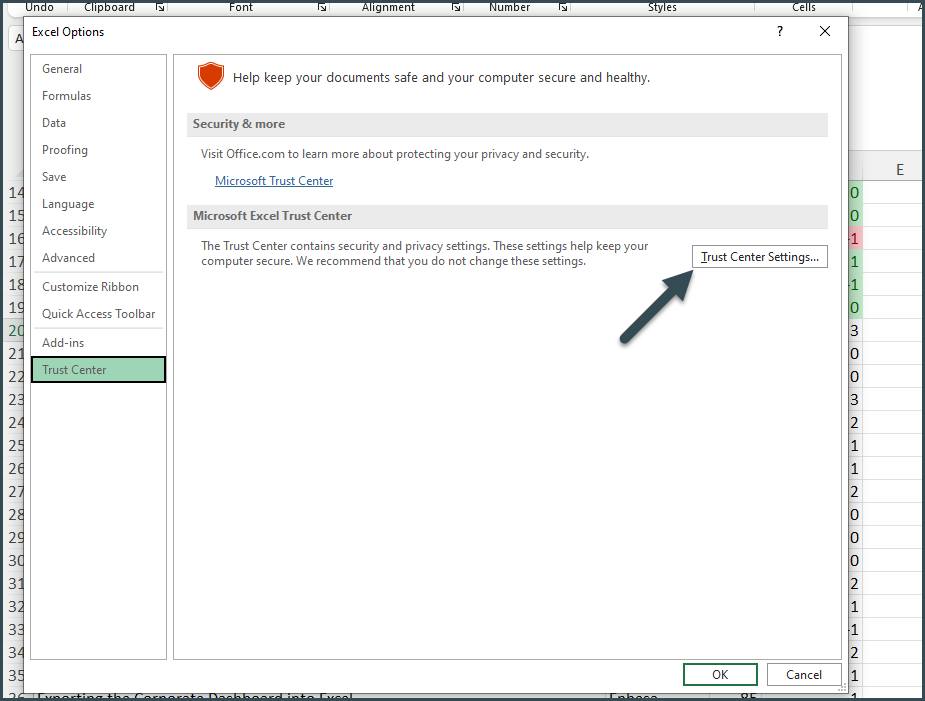
Once your Excel Options window has opened, please navigate to the “Trust Center” and click on the “Trust Center Settings”. This will prompt an additional window to open.
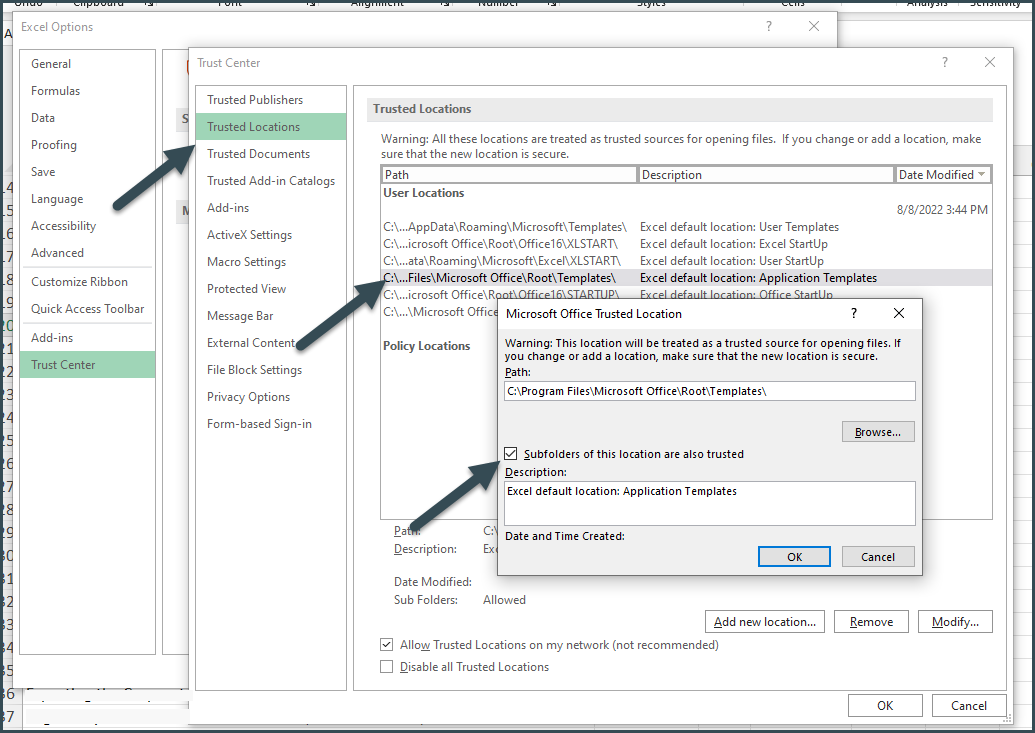
Next, please go to the "Trusted Location" and select “ C:\Program Files\Microsoft Office\Root\Templates\ and choose the option "Modify".
Make sure the box for the trusted sub folders has been ticked off. You may not have all necessary rights to add extra Trusted Locations. If this is the case, you'll want to reach out to your IT department for assistance.
Under the "Trusted Documents" tab, please ensure the box is ticked for “Allow Documents on a network to be trusted" and be sure to select "Clear"

Under the "Trusted Add-in Catalogs" tab, make sure that none of the boxes are ticked off
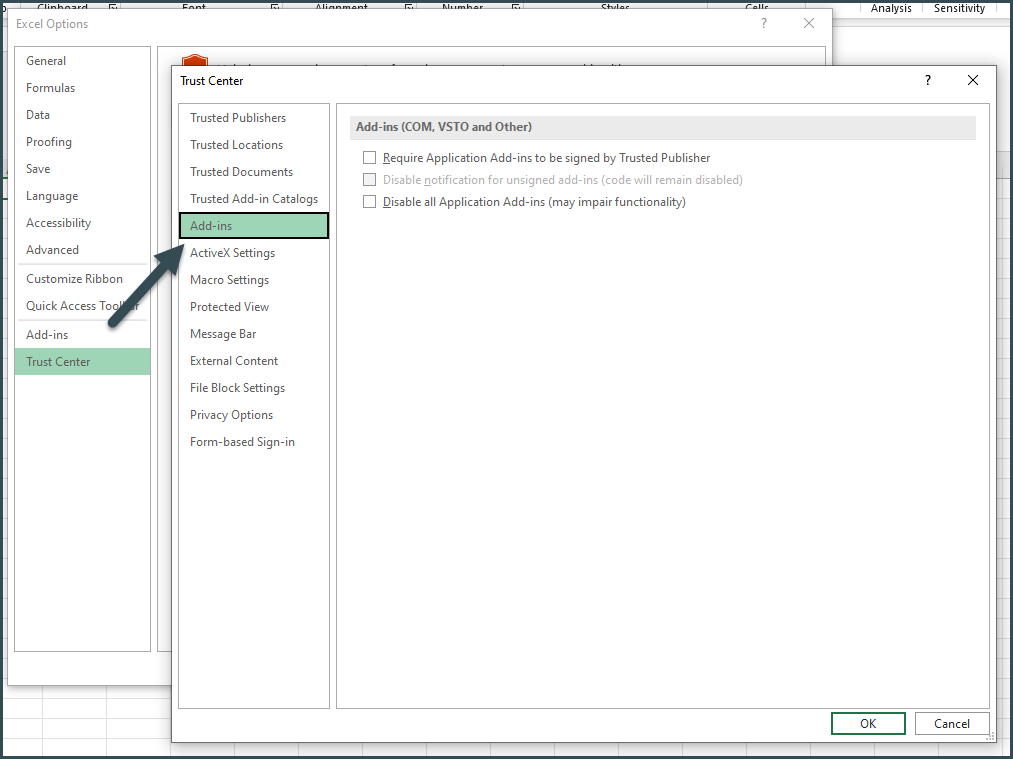
Under the "Add-Ins" Tab, make sure that none of the boxes are ticked off.
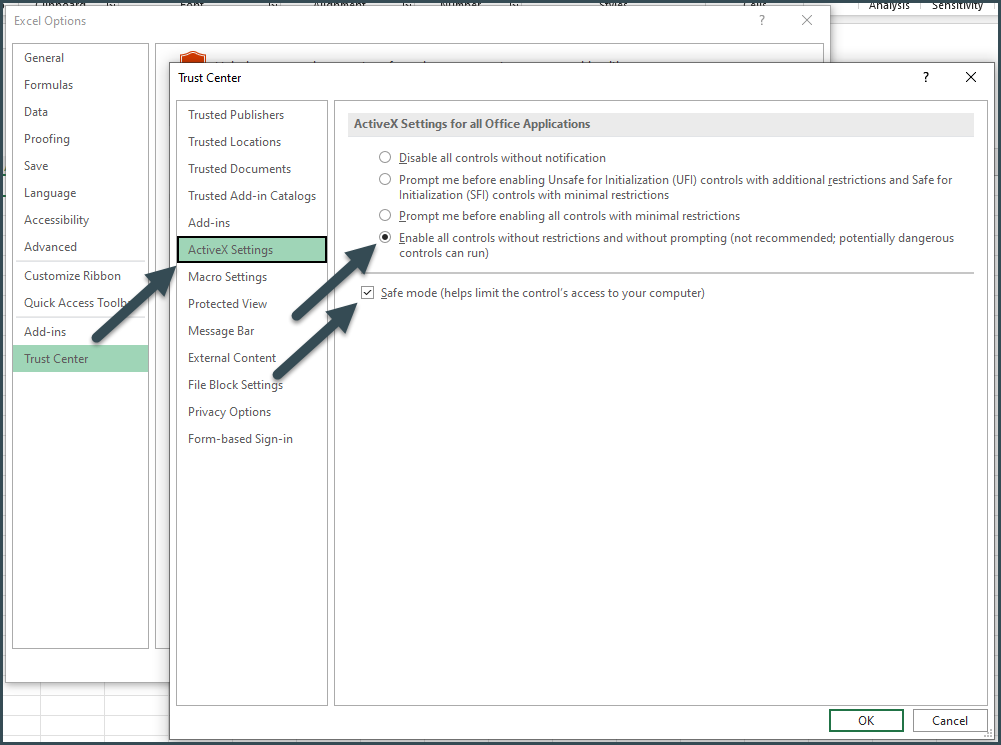
Under the "ActiveX Settings" tab, please adjust settings to enable all controls without restrictions and without prompting. Additionally, ensure the “ Safe Mode” box is ticked off.
Under the "Marco Settings" tab, Adjust settings to “Disable VBA macros with notification”
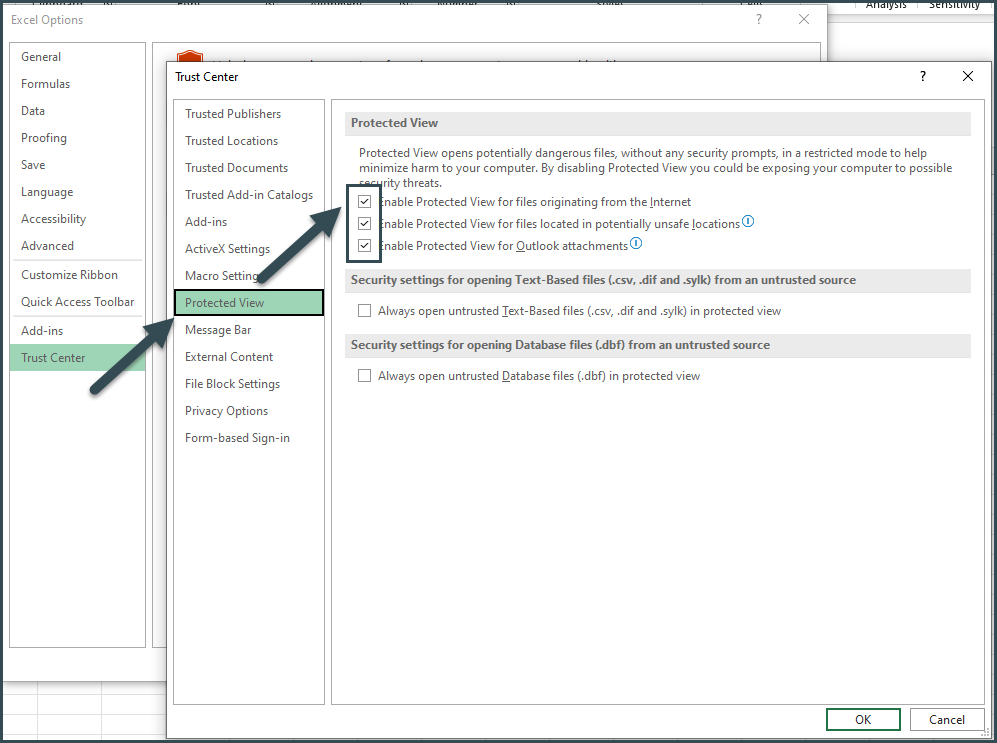
Under the "Protected View" tab, all three “Enable Protected view “ boxes should be ticked off.
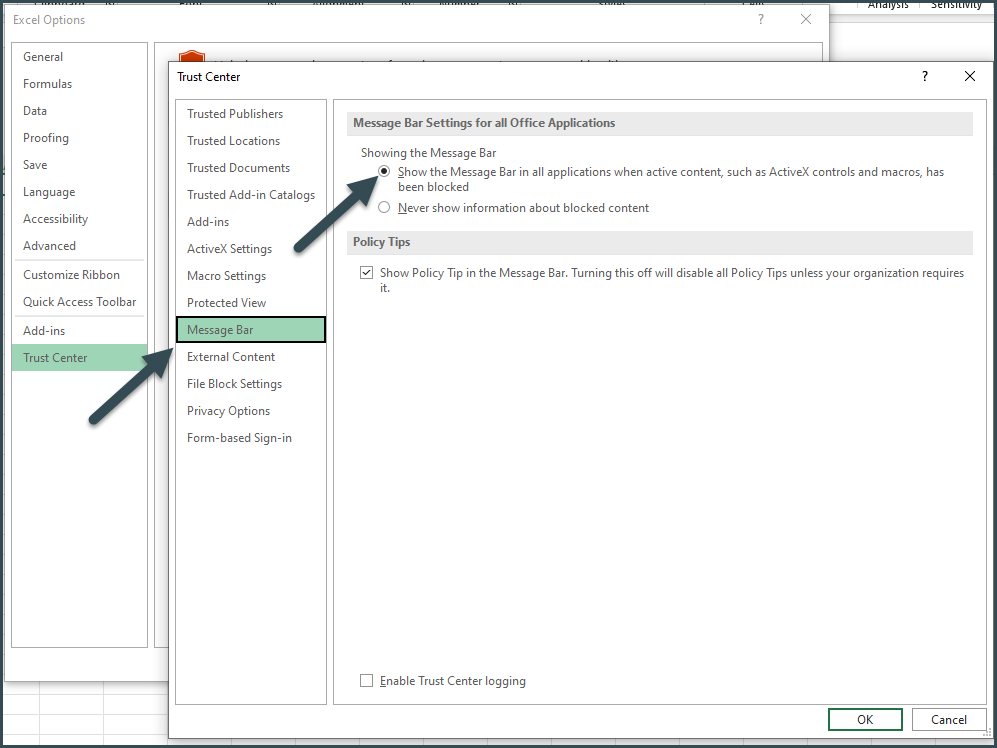
Under the "Message Bar" tab, please choose the option “Show the massage bar in all applications…”
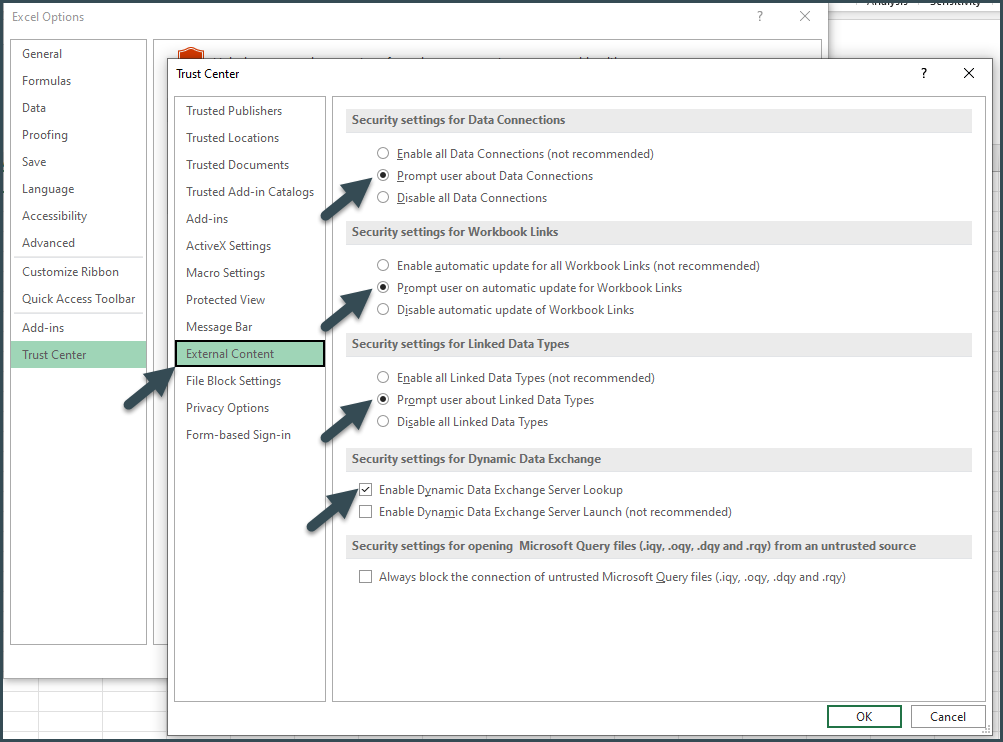
Under the "External Content" Tab, please replicate the items listed below.
- Select “Prompt user” of all three of the first security questions
- Please tick off “Enable Dynamic Data Exchange Server lookup”
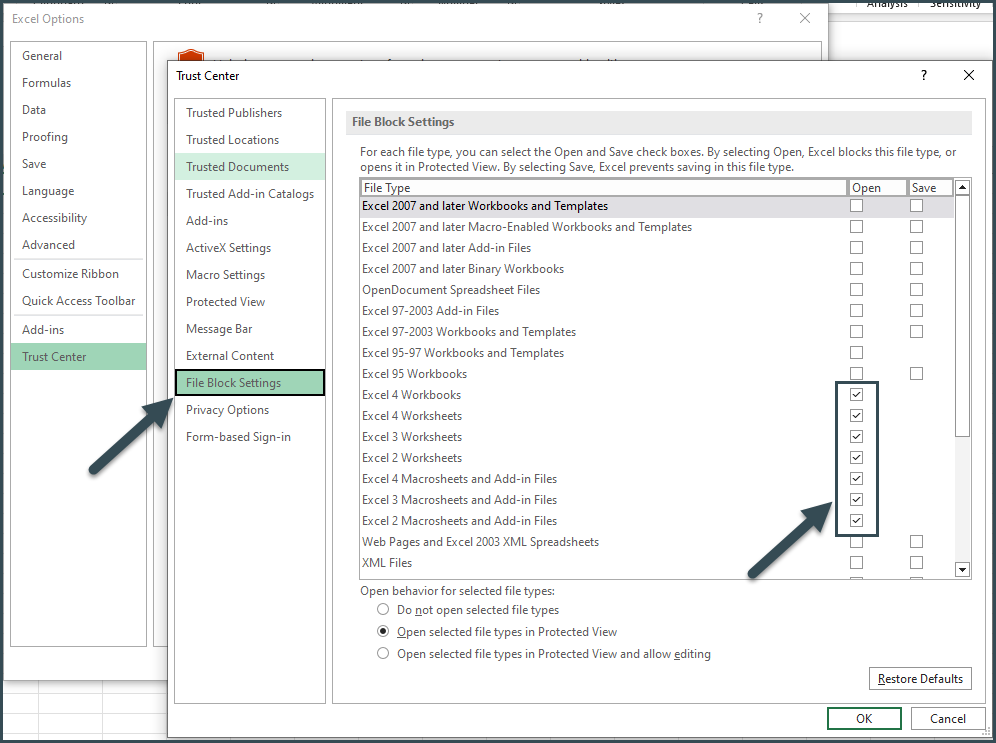
Under the "File Block Settings", make sure to have Excel 4 through Excel 2 Macrosheet and Add-in Files ticked in the "Open" column.
Once you have gone through each of the tabs in the Trust Center Settings window, please press "OK". These changes will be applied to your Excel ScoreCards.
If you have gone through these instructions and have any questions or are still experiencing issues, please reach out to services@enhesa.com for assistance.
Related article: Enhesa ScoreCard TroubleShooting